مافي شي تخسره — بس ابتسامة أجمل تربحها!


Thank you for choosing the daphino 2500LM Solar Lights. This manual provides essential information for the proper installation, operation, and maintenance of your new solar-powered security lights. Please read these instructions carefully before use to ensure optimal performance and longevity of the product.

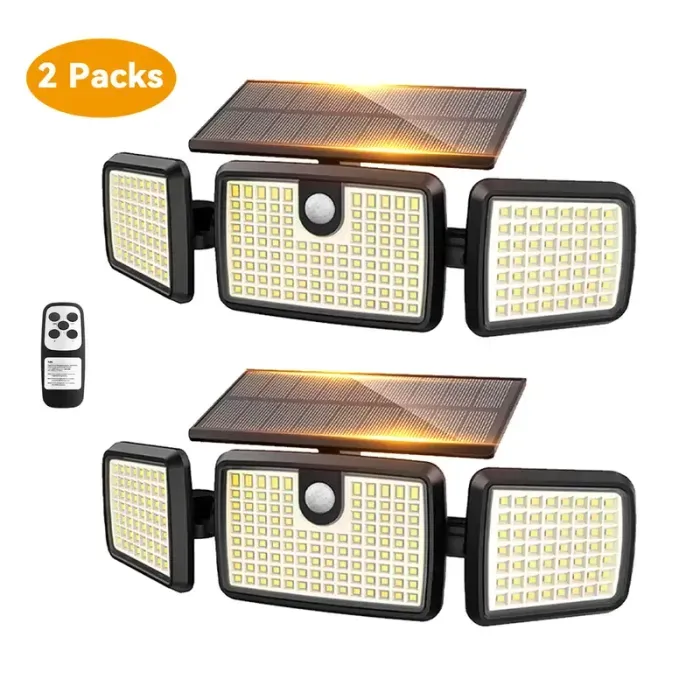
Image: Two daphino 2500LM Solar Lights, showcasing their design with a central motion sensor and adjustable side panels.
2. Product Overview
2.1 Package Contents
- 2 × Solar Light Units
- 2 × Wall Brackets
- 4 × Plastic Anchors
- 4 × Screws
- 1 × Instruction Manual
2.2 Key Features
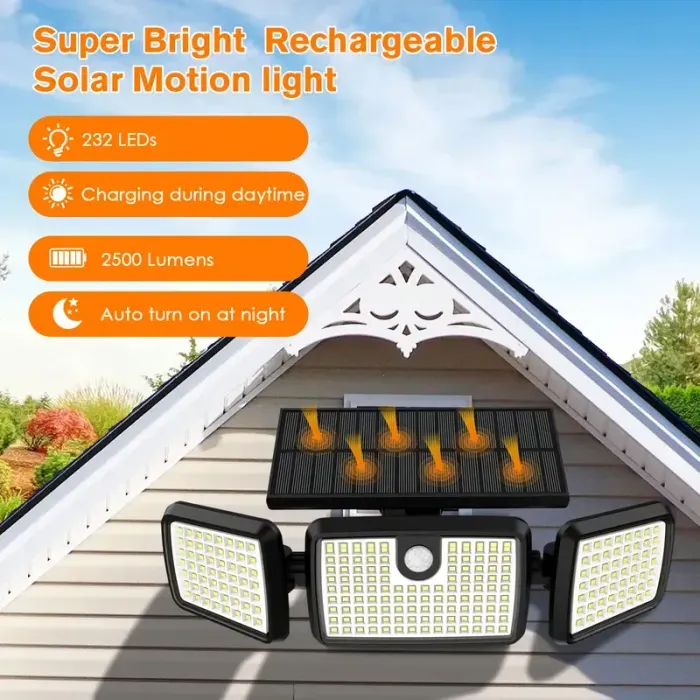
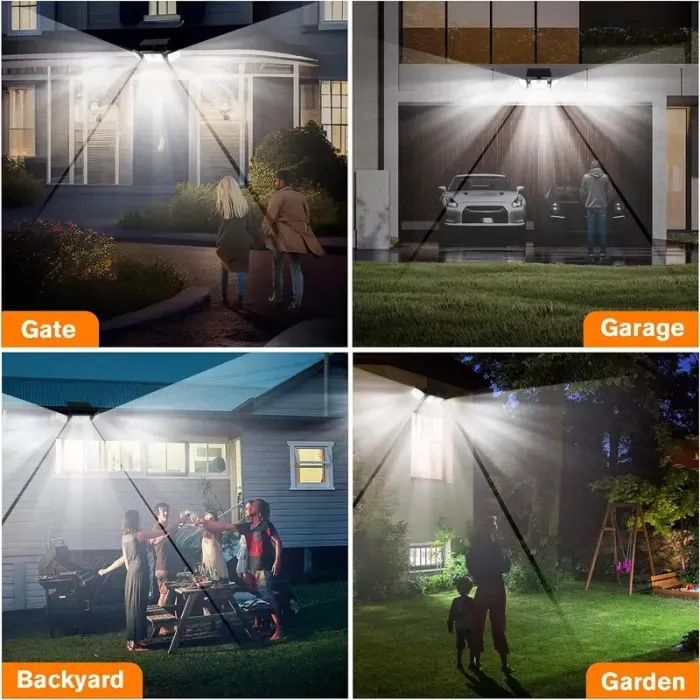
- Super Bright Illumination: Up to 2500LM 6500K output with newly upgraded LEDs for wide light emission.
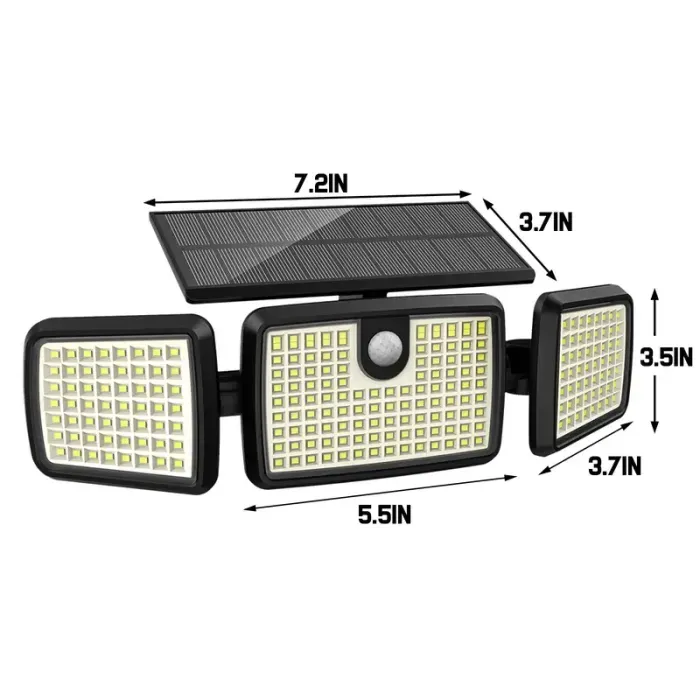
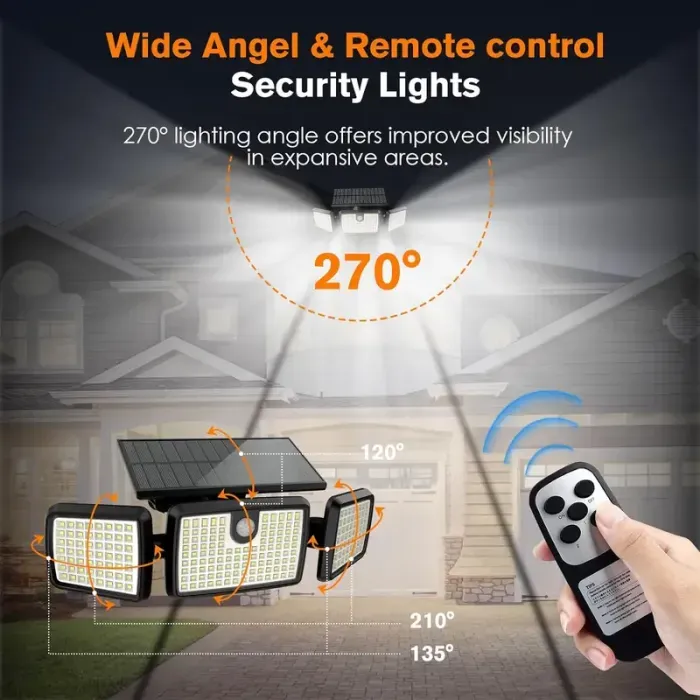
- Adjustable Design: Solar panel independently adjustable by 90°, and left/right light heads independently adjustable by 90°, providing up to 355° illumination angle.
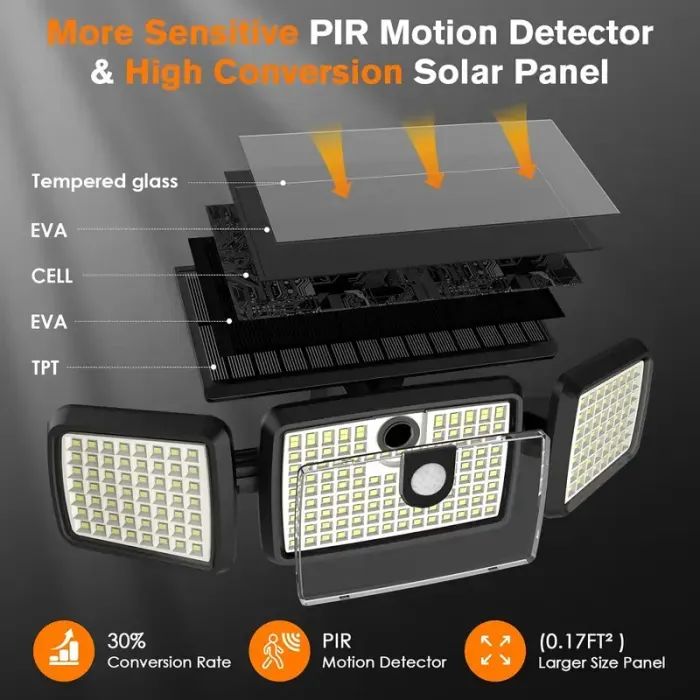
- Advanced Motion Sensor: Built-in microwave sensor chip with high sensitivity, detecting movement up to 40 ft.
- Durable & Weatherproof: IP65 waterproof rating, designed to withstand various weather conditions (frost, rain, heat).
- Long Working Time: Equipped with a high-capacity lithium-ion battery for extended operation, even on cloudy days.
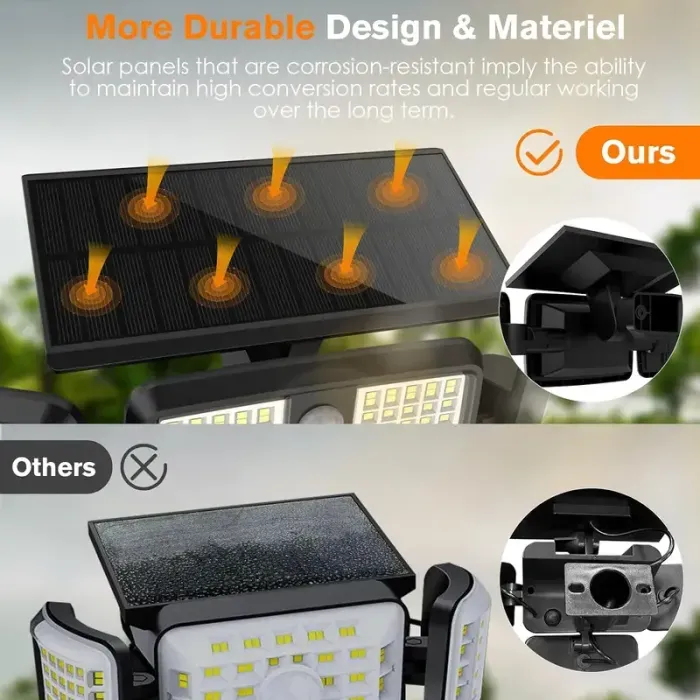
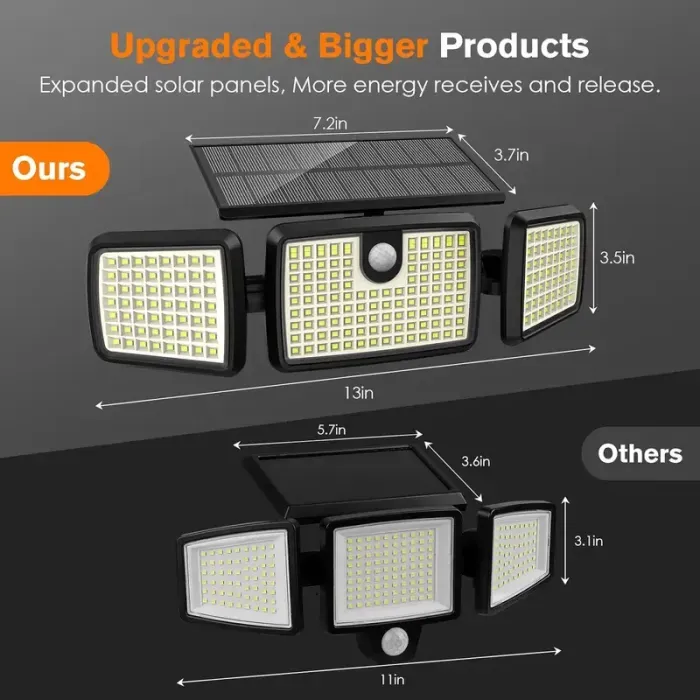
- Energy Efficient: Features an optimized fiber-reinforced laminated solar panel for improved conversion efficiency.

Image: Illustration of the solar light’s functionality, including daytime charging, nighttime operation, temperature resilience, and IP65 waterproof rating.

Image: The solar light demonstrating its fully enclosed, water-resistant design during inclement weather.
3. Installation
Follow these steps for proper installation of your daphino solar lights:
- Choose a Location: Select a location that receives direct sunlight for at least 6-8 hours daily to ensure optimal charging. A recommended installation height is approximately 8 feet (2.4 meters).
- Mark Drill Points: Use the wall bracket to mark the positions for drilling holes.
- Drill Holes and Insert Anchors: Drill holes at the marked positions. Insert the plastic anchors into the drilled holes.
- Mount the Bracket: Secure the wall bracket to the wall using the provided screws.
- Attach the Light: Hang the solar light unit onto the mounted bracket, ensuring the solar panel is facing upwards to maximize sun exposure.
- Adjust Panels: Adjust the angle of the solar panel and the three light heads to achieve the desired illumination area.

Image: Step-by-step visual guide for installing the solar light, including recommended height and solar panel orientation.

Image: The solar light unit detached from its mounting bracket, showing the components involved in installation.
4. Operating Instructions
The daphino solar light features three distinct operating modes. To select a mode, locate the button on the back of the light unit and press it to cycle through the options.
4.1 Lighting Modes
- Mode 1: Motion Sensor Full Brightness
The light remains off until motion is detected. Upon detection, the light turns on at 100% brightness for approximately 30 seconds, then turns off. - Mode 2: Dim Light All Night + Motion Sensor Full Brightness
The light stays on at a continuous 30% brightness throughout the night. When motion is detected, it brightens to 100% for approximately 30 seconds, then returns to 30% brightness. - Mode 3: Low Light All Night + Motion Sensor Full Brightness
The light stays on at a continuous 10% brightness throughout the night. When motion is detected, it brightens to 100% for approximately 30 seconds, then returns to 10% brightness.

Image: Visual representation of the three operational modes, illustrating light behavior with and without motion detection.
